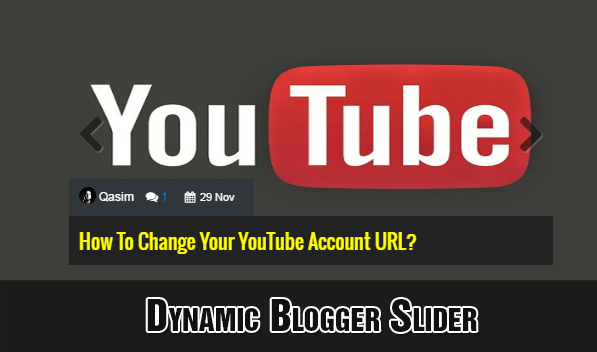
 Ever wondered how to display your most recent posts from a selected category inside a dynamic Image slider? Lets create a responsive content slider for BlogSpot blogs that may display recent posts from a specific label automatically. Without our Blogger JSON Feeds guide, building blogspot widgets would not have been that easy!
UPDATE: We just released Random Posts Slider Widget and a Static Slider For Blogger!
Image Sliders for blogs play a vital role in showcasing your featured content whether it be a static list of featured images linked to your bog posts or a dynamic/automatic list of recent posts from a specific label or a automatic list of random posts. We are sharing with you all for the first time, all these three amazing blogger sliders built using FlexSlider and Blogger JSON Feeds API. These blogspot widgets are rarely shared with all advanced functionality and we are pleased to develop them exclusively for blogger community.
In the past we have developed and shared several static Content Sliders for blogspot blogs but this time we will learn how to make that content load dynamically instead of manually creating the featured content list and then displaying it.
See our previous sliders by following these links:
Features of Blogger Slider
Blogger Slider is an advanced widget equipped with these features:
- Author Avatar - Unique!
- Displays recent posts dynamically inside Slider. - Unique!
- Displays recent posts from a specific category/label.
- Slider with two animations: Slide & Fade - Unique!
- Clickable Comments Count
- Custom Date Format
- Clickable Animated Featured Image Thumbnails
- Option to increase or decrease Image Resolution for quality- Unique!
- Support for Third-party Images and YouTube Video thumbnails - Unique!
- Title Length is adjustable
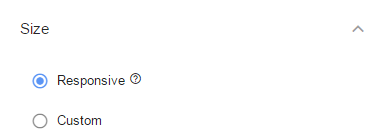
Most Responsive Content Slider For Blogger Blogs!
Blogger slider is built using FlexSlider and it therefore automatically adopts the width of the parent container. Multiple breakpoints are added to ensure the slider fits to device screen size just perfectly. See the screenshots below
[ SMARTPHONES ]

[ TABLETS / IPADS]
[ DESKTOP / LAPTOPS ]
Add Blogger Slider To Your Blogspot Template
Follow these simple steps:
- Go To Blogger > Template
- Backup your template
- Click "Edit HTML"
- Just below
<head>tag paste the following JS and CSS source links:<script src='http://ajax.googleapis.com/ajax/libs/jquery/1/jquery.min.js' type='text/javascript'></script>
<link href='http://fortawesome.github.io/Font-Awesome/assets/font-awesome/css/font-awesome.css' rel='stylesheet'/>
<link href='http://fonts.googleapis.com/css?family=Oswald' rel='stylesheet' type='text/css'/>
<link href='https://cdnjs.cloudflare.com/ajax/libs/flexslider/2.6.1/flexslider.min.css' rel='stylesheet' type='text/css'/>
<script src='https://cdnjs.cloudflare.com/ajax/libs/flexslider/2.6.1/jquery.flexslider.min.js' type='text/javascript'></script>Note: Do not add JQuery, FontAwesome, FlexSlider or Oswald source links to your template if you are already using them on your site.
- Next search
]]></b:skin>and just above/before it paste the following code:
/*######### Blogger Slider By MyBloggerTricks #############*/
.mbt-s{margin:0 5px;border:0;width:100%;overflow:hidden}
.mbt-s .slides{list-style-type:none;margin:0 auto;padding:0}
.mbt-s li{color:#fff;font-family:helvetica;font-size:12px;overflow:hidden;padding-top:10px}
.mbt-s .flex-control-nav li{display:inline-block;margin:0 2px}
.mbt-s .flex-control-nav a{text-indent:9999px;display:block;width:10px;cursor:pointer;height:10px;background-color:#000;border:1px solid #000;border-radius:0!important}
.flex-direction-nav .flex-prev{left:-50px}
.flex-direction-nav .flex-next{right:-50px;text-align:right}
.mbt-s .flex-control-paging{display:none}
.flex-direction-nav{position:relative;top:-250px}
.mbt-s .flex-control-nav a.flex-active{background-color:#84db06;border:1px solid #90f128}
.mbt-s .flex-div{margin:0 auto;display:block;padding:0!important;position:relative;height:370px}
.mbt-s li a{color:#0080ff;text-decoration:none}
.mbt-s i{color:#999;padding-right:5px}
.mbt-s .iline{line-height:2em;margin:0;position:relative;top:-90px;background:#31363a;padding:3px 10px;display:inline-block}
.mbt-s .icontent{line-height:1.5em;margin-top:5px}
.mbt-s div span{margin:0 5px 0 0;display:inline-block;font-weight:400}
.mbt-s .mbttitle{font-family:oswald;font-size:20px;color:#ff0;font-weight:400;text-decoration:none;position:relative;top:-90px;background:#222;padding:15px 10px;display:block}
.mbt-s .mbttitle:hover,.mbt-s .itotal a:hover{color:#fff;text-decoration:none}
.mbt-s .iedit a{text-decoration:none;color:#999;cursor:pointer}
.mbt-s .iedit:before,.mbt-s .iauthor:before,.mbt-s .itag:before,.mbt-s .icomments:before,.mbt-s .idate:before,.mbt-s .itotal span:before{font-family:fontAwesome;position:relative;padding-right:8px;color:#fff}
.mbt-s .iauthorpic{width:17px!important;height:17px!important;border-radius:50%;float:none;display:inline-block!important;margin:0;padding-right:3px;position:relative;top:3px}
.mbt-s .iFeatured{overflow:hidden;position:relative;margin:0;padding:0;width:100%}
.mbt-s .iFeatured a{background:none;padding:0;display:block;border:0px solid #eee;margin:0 -1px}
.mbt-s .iFeatured img{height:305px!important;-moz-transition:all .3s;-webkit-transition:all .3s;transition:all .3s;border-radius:0;margin:0;padding:0;opacity:.7}
.mbt-s .iFeatured:hover img{opacity:1;-moz-transform:scale(1.4);-webkit-transform:scale(1.4);transform:scale(1.4)}
.mbt-s .icomments a{color:#0080ff;font-family:arial;font-size:12px}
.mbt-s .icomments a:hover{text-decoration:underline}
.mbt-s .icomments:before{content:'\f086';padding:0 3px 0 7px;color:#fff}
.mbt-s .idate{color:#fff;padding:3px 4px;font-family:arial;font-size:11px}
.mbt-s .idate:before{content:'\f073';padding:0 5px;color:#fff} -
Make these changes
- To change the black background color behind the title edit: #222
- To change the yellow color of the slide title font edit: #ff0 and to change the white color of the title on mouse hover edit: #fff
- To change the color of the comment link eidt: #0080ff
- The color can be in rgb or #hexadecimal, both work. Use our Color Code Generator.
- Save your template.
- Now go to Blogger > Layout
- Select "Add a Gadget"
- Choose "HTML/JavaScript" gadget
- Keep the title field empty and then paste the following code inside it:
<script type="text/javascript">
$(window).load(function() {
$('.mbt-s').flexslider({
animation: "slide",itemWidth: 600,itemMargin: 25,directionNav: true,touch: true,slideshowSpeed: 2500,pauseOnHover: true,animationSpeed: 700,});});</script><div class="flexslider mbt-s">
<ul class="slides">
<script type="text/javascript">
//################### Defaults
var ListBlogLink = "http://mybloggertricks.com";
var ListCount = 6;
var ListLabel = "Events";
var TitleCount = 66;
var ImageSize = 600;
//################### Function Start
function mbtslide(json) {
for (var i = 0; i < ListCount; i++)
{
//################### Variables Declared
var listing= ListImage = ListUrl = ListTitle = ListImage = ListContent = ListConten = ListAuthor = ListTag = ListDate = ListUpdate = ListComments = thumbUrl = TotalPosts = sk = AuthorPic= ListMonth = Y = D = M = m = YY = DD = MM = mm = TT = "";
//################### Category
if (json.feed.entry[i].category != null)
{
for (var k = 0; k < json.feed.entry[i].category.length; k++) {
ListTag += "<a href='"+ListBlogLink+"/search/label/"+json.feed.entry[i].category[k].term+"'>"+json.feed.entry[i].category[k].term+"</a>";
if(k < json.feed.entry[i].category.length-1)
{ ListTag += " ";}
}
}
//################### URL
for (var j = 0; j < json.feed.entry[i].link.length; j++) {
if (json.feed.entry[i].link[j].rel == 'alternate') {
break;
}
}
ListUrl= "'" + json.feed.entry[i].link[j].href + "'";
//################### Info
TotalPosts = json.feed.openSearch$totalResults.$t;
if (json.feed.entry[i].title!= null)
{
ListTitle= json.feed.entry[i].title.$t.substr(0, TitleCount);
}
if (json.feed.entry[i].thr$total)
{
ListComments= "<a href='"+json.feed.entry[i].link[j].href+"#comment-form'>"+json.feed.entry[i].thr$total.$t+"</a>";
}
ListAuthor= json.feed.entry[i].author[0].name.$t.split(" ");
ListAuthor=ListAuthor.slice(0, 1).join(" ");
AuthorPic = json.feed.entry[i].author[0].gd$image.src;
//################### Date Format
ListMonth= ["Jan", "Feb", "Mar", "Apr", "May", "Jun", "Jul", "Aug", "Sep", "Oct", "Nov", "Dec"];
ListDate= json.feed.entry[i].published.$t.substring(0,10);
Y = ListDate.substring(0, 4);
m = ListDate.substring(5, 7);
D = ListDate.substring(8, 10);
M = ListMonth[parseInt(m - 1)];
ListUpdate= json.feed.entry[i].updated.$t.substring(0, 16);
YY = ListUpdate.substring(0, 4);
mm = ListUpdate.substring(5, 7);
DD = ListUpdate.substring(8, 10);
TT = ListUpdate.substring(11, 16);
MM = ListMonth[parseInt(mm - 1)];
//################### Thumbnail Checkif (json.feed.entry[i].media$thumbnail)
{
thumbUrl = json.feed.entry[i].media$thumbnail.url;
sk= thumbUrl.replace("/s72-c/","/s"+ImageSize+"/");
ListImage= "'" + sk.replace("?imgmax=800","") + "'";
}// YouTube scan
else if (json.feed.entry[i].content.$t.match(/youtube\.com.*(\?v=|\/embed\/)(.{11})/) != null)
{
var youtube_id = json.feed.entry[i].content.$t.match(/youtube\.com.*(\?v=|\/embed\/)(.{11})/).pop();
if (youtube_id.length == 11) {
var ListImage = "'//img.youtube.com/vi/"+youtube_id+"/0.jpg'";
}
}else if (json.feed.entry[i].content.$t.match(/src=(.+?[\.jpg|\.gif|\.png]")/) != null)
{
// Support For 3rd Party Images
ListImage = json.feed.entry[i].content.$t.match(/src=(.+?[\.jpg|\.gif|\.png]")/)[1];
}
else
{
ListImage= "'https://blogger.googleusercontent.com/img/b/R29vZ2xl/AVvXsEhRS8JlNqJynK19QFPAfjfEF2iNoqGX0_goRZLVHf6QEZio8WEN7NBFxcZ4uUjdqN1_xc21qqxcP3ahJ4LPYczMMuh6dibtZHA3GcKUrrrd8tTraE98gUXZLrzJ1ptr_suFT-6sGP2wqOs/s200/Icon.png'";
}
//################### Printing List
var listing = "<li><div class='flex-div'><div class='iFeatured'><a href="
+ ListUrl+
"><img src="
+ListImage+
"/></a></div><div class='iline'><span class='iauthor'><img class='iauthorpic' src='"+AuthorPic+"'/>"
+ListAuthor+
"</span><span class='icomments'>"
+ListComments +
"</span> <span class='idate'>"
+ D +
" "
+ M +
"</span></div><a class='mbttitle' href="
+ListUrl+
"target='_blank'>"
+ListTitle+
"</a></div></li>";document.write(listing);
} }
<!-- #### Invoking the Callback Function #### -->
document.write("<script src='"+ListBlogLink+"/feeds/posts/default/-/"+ListLabel+"?alt=json-in-script&callback=mbtslide'></"+"script>");
</script>
</ul></div>Changing the following control options will help you customize blogger sider:
- animation: You can select two values here. "slide" or "fade"
- slideshowSpeed: You can set the speed of the slideshow cycling, in milliseconds
- animationSpeed: You can also set the speed of animations, in milliseconds
- pauseOnHover: Pause the slideshow when hovering over slider, then resume when no longer hovering
- If you don't want to use the title then delete the yellow highlighted code.
- ListBlogLink : Insert your Blog URL here
- ListCount : Decide how many posts do you wish to display.
- ListLabel : Insert your blog label here. Remember that labels are case sensitive. Therefore type it exactly as it is shown in your browser address bar.
- TitleCount : Choose how many characters to display in slide title.
- ImageSize : You can control the resolution or aspect ratio of thumbnails by editing ImageSize = 600; where the value 600 means that you want your images to be within 600 x 600 pixels in dimension.
- /-/"+ListLabel+" Delete this line if you wish to display latest posts of your blog without mentioning a label
- Click Save and you are all done!
Need Help In Installation of Blogger Slider?
I just hope you may find this cool slider widget useful and easy to apply. Let me know if you need any help during the installation process of this content slider. You are most welcomed to post your questions in the comment box below. In our next tutorials we will share how to create Random Posts Content Slider for blogger.
Stay tuned and keep customizing your blog to take it to the next level! =)


 and then select Settings.